The final in our three-part How-To carving series takes us through the process of finishing and painting our Christmas elf with accomplished multimedia carver and sculptor Justin Gordon of Groveland, Mass.

For the previous two lessons, click the links below:
Part I - Blocking out the carving on the wood
Part II - Carving process
Part III – Finishing/Painting
LINSEED OIL COATING
When he finishes any carving, Justin said it’s a tough call on whether to paint it or not. When it’s a nice grained wood, he typically goes with a natural finish. But if he wants to paint it, he has to be careful, because according to him, a good carving can become firewood with a lousy paint job.
He starts with a coating and sealer of boiled linseed oil, then paints with acrylics.

“My personal preference when painting is to have some wood grain showing.” Justin stated. “That way it doesn’t end up looking plastic or like something you bought at the Christmas tree shop for $3.97.”
“I like using the linseed oil first as I can control the amount of paint better to get the desired color I want,” Justin said.
The “oiled up” elf is shown in the photo below after being coated with linseed oil.

PAINT COLORS
In this elf’s case, Justin said life is easy because he has a good picture to go by for painting (see below). “I love the colors in the picture so I can just copy it as much as I want to,” he said. “The colors seem to be mostly earth tones. This elf looks old so I’m planning to antique the whole thing at the end.”
Here is Justin’s plan for painting the elf:
Antique Gold – Hat brim, shoes, bells and skirt trim above the bells
Barn Red – Pants, hat stripes, and highlights on nose, cheeks and lips
Antique Ivory – Since this elf looks old, Justin is using Ivory instead of white for his eyes
Alpine Green – Top and tunic skirt. Slate green would work here too.
Engine Red – The red in the puffy shoulder pads looks a little brighter than the other red, so Justin used Engine Red here, instead of Barn Red.
Light Gray/White – For the beard, Justin used his usual “Santa beard color” – a light gray base color that is then dry brushed with straight white.
White – In addition to the white on the beard, Justin used white for the hat sock stripes, thinned down enough for the grain to show.
Face and Hands – Since the linseed oil leaves a nice flesh tone on the face and hands, Justin left these natural. “Some folks tint the linseed oil with burnt umber or raw sienna for a better flesh tone. Some even paint the flesh a color.” Justin said. “For me, that’s too much paint and painting, so I leave it natural.”

PAINTING TIPS
Before Justin started painting, he used his woodburner to put distinct lines where color separations would be, such as the green/gold skirt trim lines and red/white stocking hat stripes. “This made adjoining colors a breeze with no bleeding between the two,” Justin remarked. “I had to be careful to make sure I had the right amount of stripes on the hat stocking so I ended up with alternating colors all around it.”
When Justin paints, he likes to dilute the paint to keep the colors light enough to allow the natural grain to show through. He applies the paint as needed to get the color brightness he wants.
“The only thing I use straight paint for is the eyes because they need a little more color to be more visible,” Justin instructed. “Oh, and when I dry brush the hair, that’s straight paint.”

For the eyes, Justin uses a tiny little brush “with about 10 hairs” and 5x magnification. “Gotta have the 5x at my semi advanced age,” Justin chuckled.
The green top and skirt have light gray highlights on them in the reference picture. The gold shoes and bells also have almost white highlights. Using a drybrushing technique, Justin dipped the brush into the paint, then wiped most of it off on a rag (a paper towel works too). He then applied in light strokes to add the highlights as needed.

POSITIONING THE IRISES
Once the carving was mostly painted, Justin needed to choose the location for the elf’s irises. Looking down can give the elf a harsh or angry look, while looking up and away at 10 or 2 o’clock usually produces a happy and curious look. In order to find that perfect location, Justin tested a few different looks using two small pieces of electrical tape with convex edges before painting permanently.
1. In this picture, Justin put the iris in the lower left position, similar to the reference picture. “This has the angry elf or creepy elf look, and I don’t want that,” he said.
2. Next he tried placing the irises to look up and away at 10 o’clock. “This looks nice. Curious, cute, but he has a little devilish look about him like he’s hitting on Mrs. Elf,” Justin laughed.
3. In the next picture, Justin tried the irises at the straight left 9 o’clock position, more like the ref picture. “This looks okay,” Justin decided. “Kinda cute without looking angry or perverted.”


4. This pic shows the straight up noon iris. Justin felt this one looked very neutral. “Not scary, not creepy, but looks like he knows something special.”
5. This elf shows Justin’s “up and away at 2 o’clock” look. He decided this looked good but he didn’t like the elf looking away if he had something in his hand.
6. In this photo, Justin tried to get the iris to look closer to the ref pics with a space between the iris and the edge of the eye. “I kind of like it,” Justin said, “but his eyes look a little beady to me. Elves can be a little naughty or creepy, can’t they? Who knows what goes on at elf parties? Plus, they’re supposed to know more than you think.”
Ultimately Justin chose the “neutral” look of #4 (“straight up at noon”) for the final iris placement. “I think this look appeals to the most people, and I do have to sell this thing. This is my living after all.”
He typically paints eyes with turquoise in the shape of a comma, followed by the reflection dot at 2 o’clock.
ADDING A BASE
Justin chose a round oak base for the carving because of the lighter wood color and to keep the elf “lighthearted with just a little naughty.” He routed the edge to create a nice shadow around the bottom.
And here he is…the completed Elf project!

As a side note, Justin was the national winner for the 2002 Woodcraft Santa Carving Contest for his “Old World Santa.” He later sent me this carved Santa ornament (pictured below) as a keepsake, which I I still have on my desk. See his trademark style in those sparkly blue eyes!
This year Justin sent me a Christmas card (below) with the elf on it holding a jingle bell – Love it!


Thanks for sharing your great project with us, Justin, as well as your helpful tips and techniques!
One final note – Justin shared this picture (below) of his “dirty workbench” and laughed, “Many years ago while in corporate America, I learned that a clean desk is the sign of a sick mind.” Looks like you’re safe, buddy.

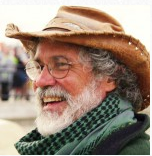
About Justin Gordon
Justin Gordon carves and sculpts in eight mediums – wood, sand, wax, snow, ice, stone, clay and foam. He concentrates on commissioned fine woodcarved figures, architectural carving, restorations, and custom clock cases. He teaches carving classes in Groveland and Randolph, Mass. See more of Justin’s work on his web site: www.ElwinDesigns.com and in our blog on his sand sculptures.
To see Justin's larger-than-life sand sculptures, check out this Woodworking Adventures blog - Fun in the Sun with Ultimate Sand Sculptures.

Stop in your local Woodcraft store, and let the staff help you with the tools, supplies and knowledge you need to start your next carving project.
We hope you'll be inspired!


